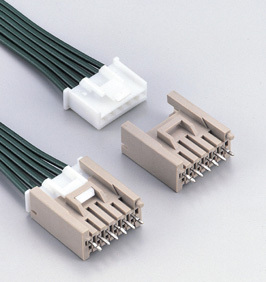
Analysis of eight wire harness production processes
1. Cut the line.
(1) Wire size shall be within tolerance;
(2) There shall be no scratch during tangent, and the notch shall be flat;
(3) Tie every 50 or 10050 or 100 pieces, and each piece shall be clearly marked with its wire gauge and length without error.
2. Put on the sheath.
Put the cut wire that must be sheathed on the terminal, put on a sheath, and pay attention to the small end downward.
3. Peel.
(1) The dimension must be within the tolerance range;
(2) Conductor copper wire shall not be stripped;
(3) The cut must be flat.
Peeling size = length of conductor riveted grid + A + 0.5mm (wire gauge: less than 0.3mm2)
Peeling size = length of conductor riveted grid + 1mm (wire gauge: 0.3-1MM 2)
Peeling size = length of conductor riveted grid + 2mm (maximum wire gauge: 10mm 2)

4. Riveted terminals.
(1) The riveting pressure or height of the terminal shall meet the requirements;
(2) No bad conditions such as deep striking, shallow striking, flying wire, terminal deformation, riveting too high or too low;
(3) Pay attention to safety. Do not put your hand into the die during riveting.
5. Assemble the rubber housing.
The direction of the riveted terminal bayonet is the same as that of the plastic shell, and then push the terminal flat to the plastic shell. After hearing the jamming sound, gently pull the wire to ensure that the terminal is correctly clamped into the plastic shell, and it is qualified if there is no falling off.
6. Testing.
01 test purpose.
Check whether the product function is normal to determine whether the product performance meets the customer's requirements.
02 precautions.
(1) After the test, check whether the plastic shell is scratched and whether the terminal is skewed;
(2) If the continuous electrical test is defective, it shall be reported to the superior or quality control in time;
(3) Distinguish high-quality products from low-quality products, clearly mark them, and place the low-quality products in the designated position;
(4) The vulnerable test head shall be replaced in time according to the actual situation.
7. Assembly.
(1) Position and dimension of tooling positioning column within the tolerance range of engineering drawing;
(2) When fixing a single piece, it shall not be misplaced;
(3) The tape shall be overlapped and wound with at least one lap at the beginning and end, and the dimensions of each part shall be within the tolerance range.
8. Packing and warehousing.
During packaging, pay attention not to over loading, under loading, mixed loading, identification, blurred handwriting and other adverse conditions.


